Guide
Demystifying Your New Heat Pump Installation Journey
Understanding the Heat Pump Installation Process: What Homeowners Need to Know
The heat pump installation process transforms your home's comfort system into an energy-efficient powerhouse. Understanding what happens during installation helps you prepare and ensures the best results.
Quick Overview: The 5 Key Phases of Heat Pump Installation
- Pre-Installation Assessment - Home evaluation, load calculations, and system sizing
- Equipment Selection - Choosing the right heat pump for your home's specific needs
- Professional Installation - Removing old equipment, placing new units, and connecting all systems
- System Commissioning - Testing, calibration, and verifying proper operation
- Homeowner Education - Learning to operate and maintain your new system
A heat pump transfers heat rather than creating it. In winter, it moves warmth from the outside air indoors. In summer, it reverses, pulling heat from your home and releasing it outside. This process uses far less energy than systems that burn fuel or use electric resistance heating.
Industry research shows 90% of all HVAC systems are installed incorrectly, leading to reduced efficiency and shorter equipment lifespan. A proper, professional installation is crucial and typically takes a full day (around 8 hours). The journey involves careful planning, precise calculations, and thorough testing to ensure reliable comfort and maximum energy savings.
, Phase 2 - Equipment Selection (choosing properly sized unit, considering home layout and climate), Phase 3 - Professional Installation (safe removal of old system, outdoor unit placement on level pad, indoor unit installation, refrigerant line connections, electrical wiring, condensate drain setup), Phase 4 - System Commissioning (pressure testing, vacuum evacuation, refrigerant charging, airflow verification, testing heating and cooling modes), Phase 5 - Homeowner Education (system operation walkthrough, thermostat programming, maintenance schedule, filter replacement guidance) - heat pump installation process infographic")
Phase 1: Pre-Installation Planning and Assessment
The heat pump installation process begins long before any equipment arrives. This planning phase is about understanding your home as a complete system to ensure comfort and efficiency.
A professional consultation involves assessing your home's thermal envelope—the barrier between your indoor space and the outdoors. We examine insulation, windows, and air leaks, as these details significantly impact heat pump performance. Addressing issues like air and duct leaks before installation can reduce your home's heating and cooling needs, potentially allowing for a smaller, more efficient system. We also evaluate your existing HVAC setup to plan for seamless integration.

Critical Sizing for the Heat Pump Installation Process
One of the biggest mistakes in HVAC is improper sizing. A system that's too large or too small leads to wasted energy, poor comfort, and a shorter lifespan. Square footage alone is not enough. A Manual J Load Calculation is essential for correct sizing.
This detailed calculation considers factors like your climate zone, home orientation, window efficiency, insulation levels, occupancy, and even heat-generating appliances. A Manual J Load Calculation is essential for proper sizing and is the foundation of a successful installation.
- An undersized heat pump runs constantly, increasing energy bills and wearing out prematurely, leaving you uncomfortable on extreme weather days.
- An oversized heat pump short-cycles (turns on and off too frequently), which wastes energy, causes temperature swings, and creates humidity issues.
A precise load calculation ensures your new heat pump is perfectly matched to your home for optimal efficiency and comfort.
Evaluating Your Home's Existing Systems
Your home's infrastructure must be ready to support the new heat pump.
Your ductwork requires a complete inspection for leaks, proper sizing, and airflow capacity. The condition of your ducts can influence the size of the heat pump needed. We'll recommend sealing or modifications if your ducts are leaky or improperly sized to ensure peak efficiency.
The electrical system assessment is critical for safety. Heat pumps need a dedicated circuit, and older homes may require an electrical panel upgrade. Our electricians will confirm your system has sufficient capacity to handle the new unit and any supplementary heating elements, ensuring everything meets electrical codes.
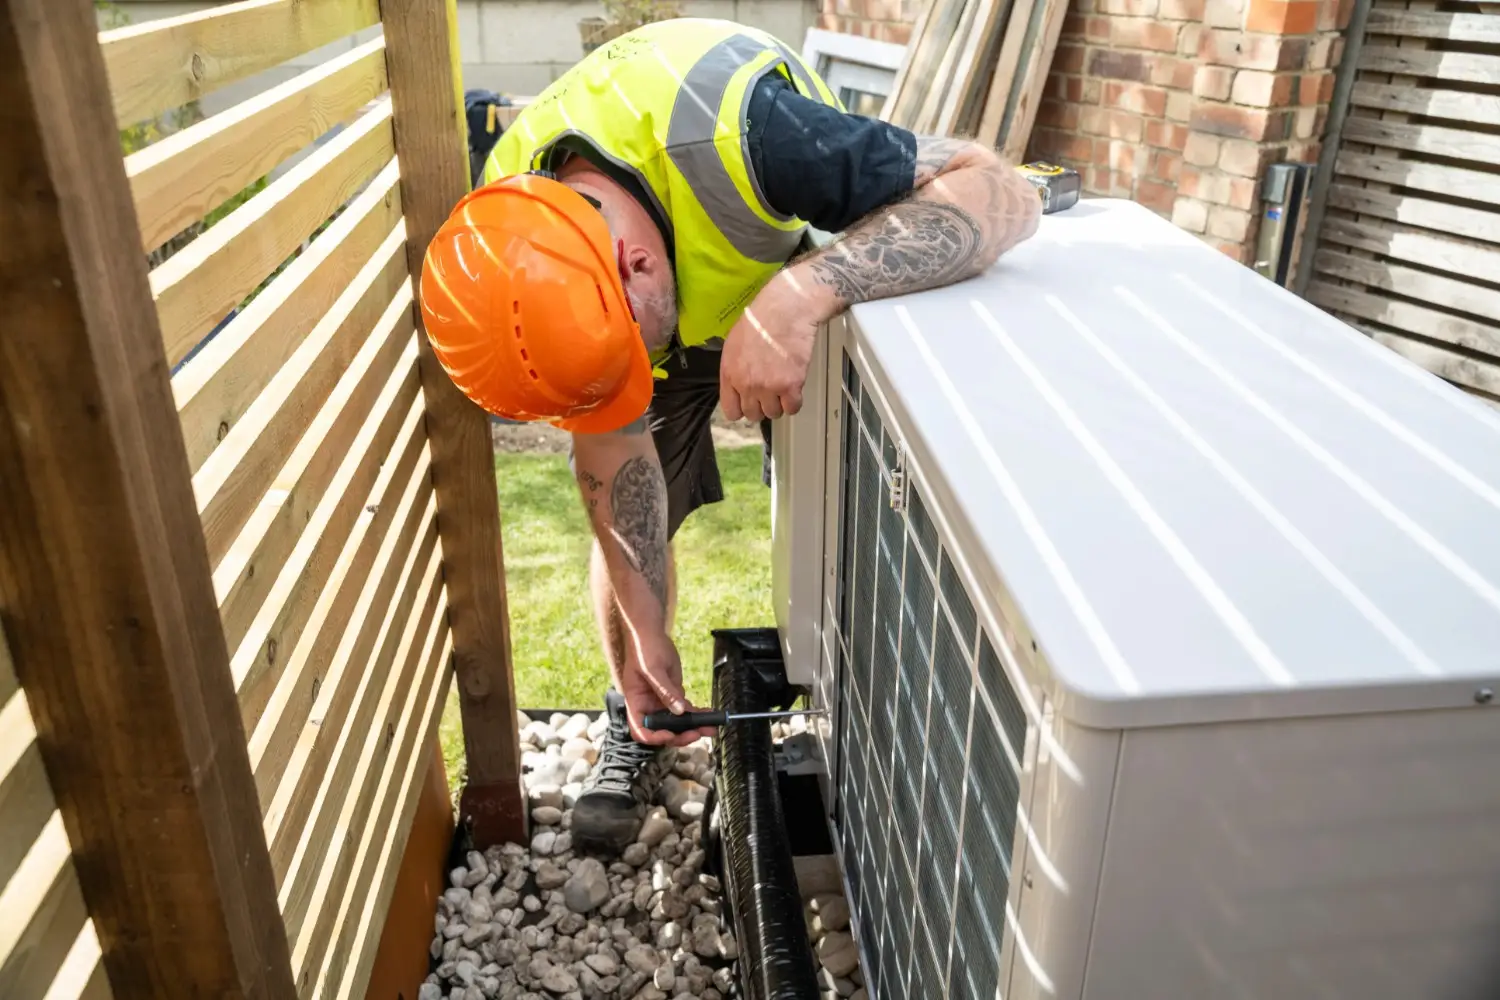
The Professional Heat Pump Installation Process Step-by-Step
On installation day, our team begins the heat pump installation process by protecting your home with drop cloths.
If replacing an old system, we start with safe removal. This includes refrigerant recovery, a critical step mandated by the EPA to protect the environment. We use specialized equipment to capture all refrigerant from the old system before hauling it away. Once the site is clear, we prepare for the new units, ensuring both the outdoor unit and indoor air handler are positioned for optimal performance.

Best Practices for Unit Placement
Proper unit placement is vital for performance and longevity.
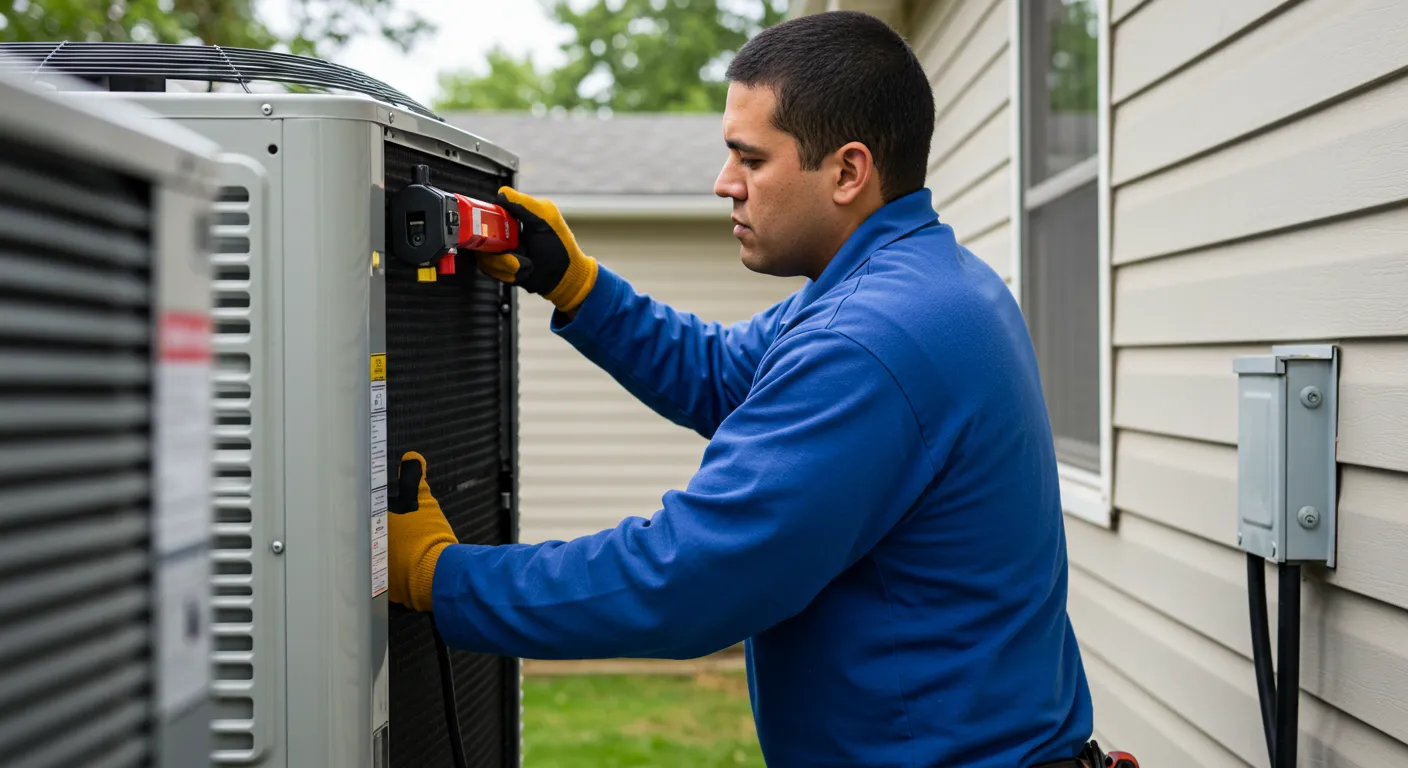
- Outdoor Unit: We install the unit on a solid, level pad to ensure proper drainage. We also ensure adequate airflow clearance (typically two feet on all sides) to prevent the system from overworking. Noise considerations are also key, so we position the unit away from windows and outdoor living areas.
- Indoor Air Handler: For ducted systems, the air handler is placed in a central location like an attic or closet. For ductless mini-splits, wall units are mounted for optimal airflow. In all cases, we ensure sufficient space for future service and maintenance.
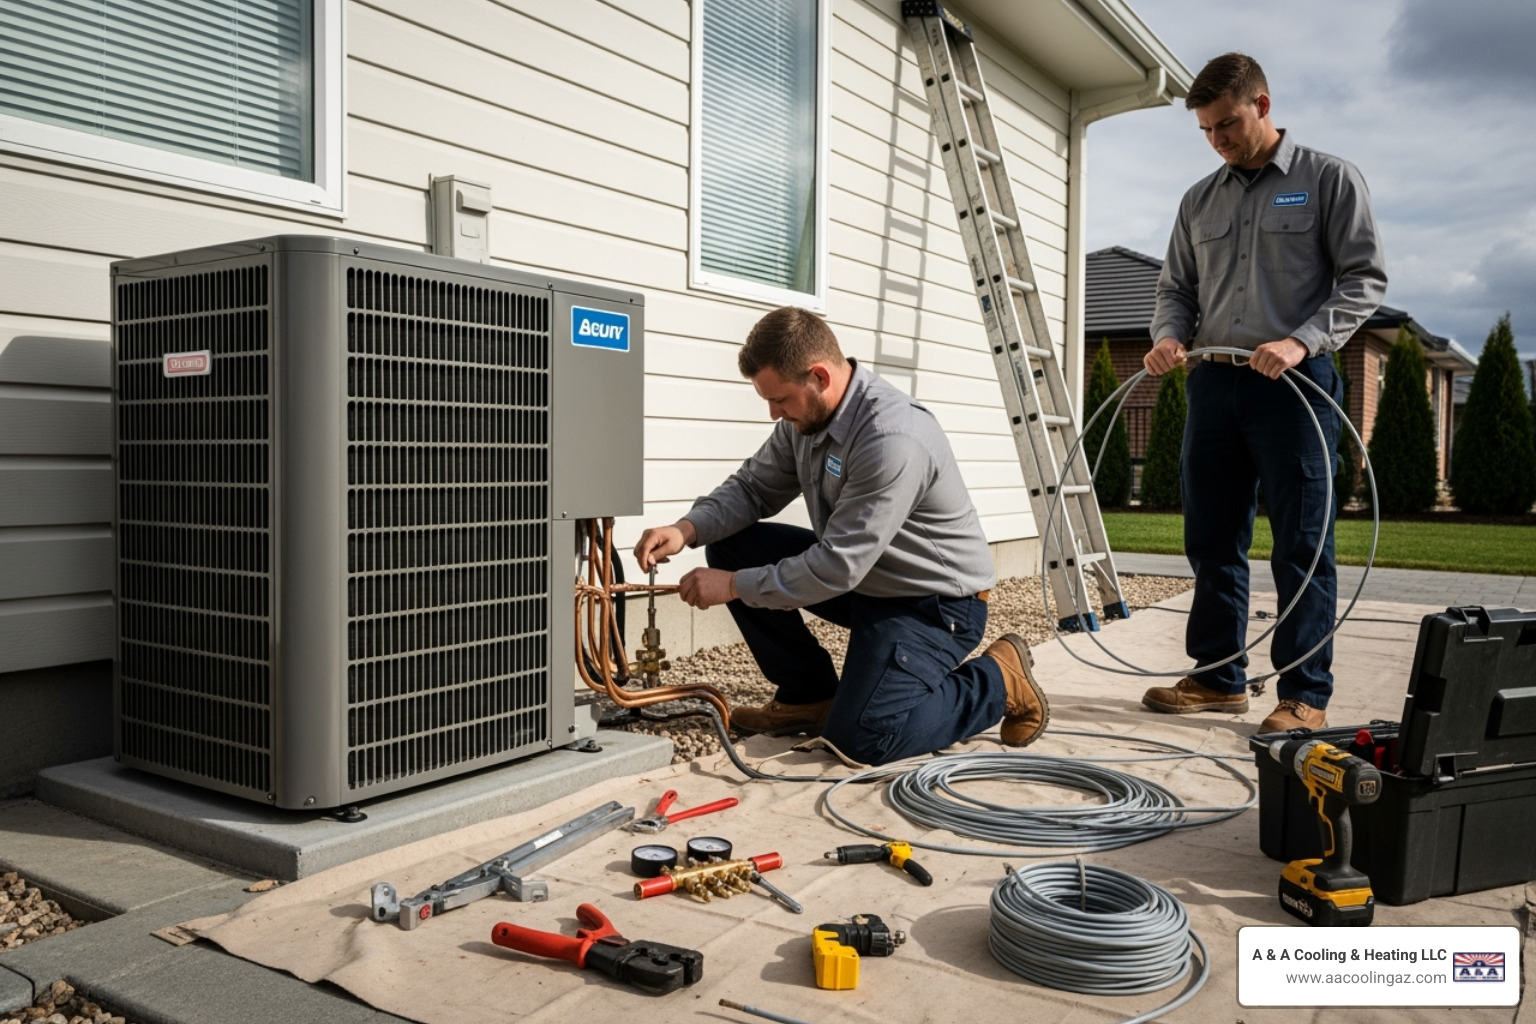
Electrical and Refrigerant Line Setup in the Heat Pump Installation Process
This phase requires technical precision to ensure perfect connections.
The electrical work includes high- and low-voltage wiring, installing a safety disconnect box, and ensuring everything meets local codes. Our electricians will also install a dedicated circuit if needed, confirming your panel can safely support the new system.
The refrigerant lines (line set) carry refrigerant between the units and must be leak-proof. We use brazing to join the copper pipes, purging them with nitrogen to prevent internal contamination and protect the compressor. After brazing, we perform a pressure test to confirm a perfect seal. Next, a vacuum evacuation removes all air and moisture, which are detrimental to performance.
Finally, we install the condensate drain, ensuring it slopes correctly to carry away water produced during the cooling cycle. Every connection is double-checked to guarantee a professional, reliable installation.
Phase 3: Commissioning and Homeowner Education
The final phase of the heat pump installation process involves bringing your new system to life and teaching you how to use it.
During system startup, our technicians check the refrigerant charge to match manufacturer specifications and verify proper airflow throughout your home. We then run the system through comprehensive tests in both heating and cooling modes, and we check the defrost cycle to ensure it functions correctly in cold weather.
Next, we handle thermostat programming, setting it up for optimal efficiency based on your household's routine.
The installation isn't complete without a thorough homeowner walkthrough. We explain how your new system operates, demonstrate thermostat functions, and answer all your questions. We also provide essential maintenance tips, such as how and when to change your filters and the importance of keeping the outdoor unit clear of debris. Understanding how heat pumps work helps you get the most from your investment.
When we leave, you'll have a perfectly functioning heat pump and the knowledge to keep it running efficiently for years.

Why Professional Installation is Crucial for Your Heat Pump
The quality of the heat pump installation process is as important as the equipment itself. While DIY kits exist, professional installation is crucial for several reasons.
- Safety: The process involves high-voltage electricity and high-pressure refrigerants, posing risks of shock, fire, or chemical burns if mishandled. It is also illegal to vent refrigerants without proper certification and equipment.
- Warranty Validation: Most manufacturers require professional installation to validate their warranties. A DIY installation could leave you responsible for costly repairs.
- Performance and Efficiency: An estimated 90% of all HVAC systems are installed incorrectly, leading to higher energy bills and premature failure. Professionals avoid common errors like improper refrigerant charging, leaky connections, and incorrect wiring.
- Peace of Mind: Professional installation ensures your system is safe, efficient, and reliable, giving you confidence that the job was done right.
Our trained technicians handle every detail, from complex calculations to careful testing, ensuring your heat pump delivers on its promise of comfort and savings.
Rebates and Incentives
Professional installation opens the door to significant financial incentives.
- Federal Tax Credits: Programs like The Energy Efficient Home Improvement Credit offer up to $2,000 for qualifying heat pump installations.
- State and Utility Rebates: The Inflation Reduction Act has authorized state-level programs that can provide substantial savings, and many utility companies offer their own rebates.
Nearly all of these programs require installation by a qualified, licensed contractor to ensure the system meets energy efficiency standards. We can help you steer these programs to maximize your savings.
Understanding Different Heat Pump Systems and Their Installation
Not all heat pumps are the same, and the heat pump installation process varies depending on the system you choose.
Here's a quick comparison of the two main installation approaches:
| Feature | Ducted Systems | Ductless (Mini-Split) Systems |
|---|---|---|
| Installation | Integrates with existing ductwork or new ducting | Requires small wall penetration, no extensive ductwork |
| Home Suitability | Homes with existing ductwork | Homes without ductwork, additions, specific zones |
| Aesthetics | Concealed in walls/ceilings (central air look) | Wall-mounted indoor units are visible |
| Zoning | Whole-home or limited zoning with dampers | Excellent zoning capabilities (individual indoor units) |
| Complexity | Can be complex with ductwork modifications | Simpler physical installation, but still requires expertise |
Ducted vs. Ductless (Mini-Split) Systems
A central ducted heat pump is often the simplest choice for homes with existing ductwork. The system connects to an indoor air handler that distributes conditioned air through your ducts, providing a whole-home solution. The complexity of the heat pump installation process for these systems depends on the condition of your ductwork; significant repairs or sealing can add time to the project.
Ductless mini-split systems are ideal for homes without ductwork, for additions, or for zoning specific areas. These systems use individual, wall-mounted indoor units connected to an outdoor unit via a small conduit. Mini-splits offer excellent flexibility and room-by-room temperature control, and their installation is less invasive as it doesn't require installing extensive ductwork.
Air-Source vs. Geothermal (Ground-Source) Systems
The other main choice is between air-source and geothermal systems, which differ in where they exchange heat.
Air-source heat pumps, the most common type, exchange heat with the surrounding air. Modern cold climate heat pumps are highly efficient, even in freezing temperatures, making them an excellent and cost-effective solution for the Apache Junction climate.
Geothermal (ground-source) heat pumps use the stable temperature of the earth for heat exchange. This is achieved via ground loops (pipes buried horizontally or drilled vertically) that circulate fluid. While geothermal systems are incredibly efficient, their heat pump installation process is far more complex and requires significant site preparation. We can help you decide which system is right for your property and goals.
Frequently Asked Questions about the Heat Pump Installation Process
We've been installing heat pumps in Apache Junction homes since 1976, and over the years, we've heard just about every question imaginable! Here are the answers to the most common ones we receive:
How long does a typical heat pump installation take?
A straightforward replacement heat pump installation process typically takes a full day, around eight hours. This allows our team to remove the old equipment, install the new units, connect all lines, and perform thorough testing. More complex projects, such as those requiring ductwork modifications or multiple mini-split installations, may take two to three days. We will provide a realistic timeline during your initial consultation.
Can a heat pump be installed in any home?
Almost any home can accommodate a heat pump. The key factors are adequate electrical capacity and sufficient space for the indoor and outdoor units. Ductless mini-split systems are a perfect solution for homes without existing ductwork. Older homes may need an electrical panel upgrade to safely support the new system. A professional assessment is the best way to determine what your home needs.
What maintenance is required after installation?
Heat pump maintenance is straightforward but vital for longevity and efficiency.
- Regular Filter Changes: Check filters monthly and change them every 1-3 months. Clean filters ensure good airflow and indoor air quality.
- Keep the Outdoor Unit Clear: Regularly remove leaves, grass clippings, and other debris from around the outdoor unit to maintain proper airflow.
- Annual Professional Maintenance: Schedule an annual tune-up to catch small issues early, maintain peak efficiency, and uphold your manufacturer's warranty. Our Cool Club maintenance plan simplifies this process.
Your Partner for a Perfect Heat Pump Installation
You've now seen the entire heat pump installation process, from assessment to commissioning. When done right by qualified professionals, this journey transforms your home into a comfortable, energy-efficient haven.
The quality of an installation depends on experience and attention to detail. Since 1976, A & A Cooling & Heating LLC has served families in Apache Junction, AZ. We have decades of hands-on experience with our unique desert climate and tailor every installation to the specific needs of your home. We don't believe in one-size-fits-all solutions.
We understand a new heat pump is a significant investment, which is why we offer flexible financing options. After installation, our Cool Club maintenance plan provides ongoing peace of mind with regular tune-ups and priority service to keep your system running at peak efficiency.
Ready to improve your comfort and lower your energy bills? Learn more about our professional heat pump services and let us create the perfect solution for your Apache Junction home.

Customer Reviews

A & A is professional, fast, and honest. They have a hometown work ethic and take care of you almost like family! Dave is a great tech and I would recommend him to anyone. We had our AC go out and they came out and stayed past 7 pm to keep us cool on a day when temps were going to reach 105! THANK YOU!
Richard Champ

Excellent service, they are very dependable and upfront about the work. I would highly recommend this company for any heating or cooling issues. Being a snowbird it’s often scary finding reliable services, this is one company you can count on.
Kathy S

A & A is professional, fast, and honest. They have a hometown work ethic and take care of you almost like family! Dave is a great tech and I would recommend him to anyone. We had our AC go out and they came out and stayed past 7 pm to keep us cool on a day when temps were going to reach 105! THANK YOU!
Jamie S


Blogs
Stay updated with our latest blog posts.