_compressed.webp)
Guide
The Ultimate Guide to Installing Your AC Condenser Unit
Understanding Your AC System and Condenser Unit
AC condenser unit installation is a complex process that requires proper planning, specialized tools, and technical expertise to ensure your cooling system operates efficiently and safely. The condenser unit is the outdoor component of your split air conditioning system that works alongside your indoor evaporator coil to remove heat from your home.
Quick Overview: AC Condenser Unit Installation Process
- Site preparation - Level ground, install pad, ensure proper clearances
- Remove old unit - Safely recover refrigerant, disconnect electrical and refrigerant lines
- Install new condenser - Set unit on pad, connect new refrigerant lines with proper brazing
- Electrical connections - Install disconnect box, connect high/low voltage wiring
- System commissioning - Vacuum system, charge with refrigerant, test operation
Your AC condenser plays a critical role in the refrigeration cycle. It houses the compressor, which pressurizes refrigerant vapor, and the condenser coil, which releases heat absorbed from inside your home into the outdoor air. This process allows the now-cooled liquid refrigerant to return to your indoor evaporator coil to continue the cooling cycle.
Modern air conditioners are 20-50% larger than older models to accommodate bigger, more efficient coils. This size difference often requires relocating the unit or modifying existing installations. The condenser must be placed outdoors where it has adequate airflow and can effectively release heat - never in enclosed spaces like attics or garages.
Split systems separate the noisy compressor and heat-rejecting components outside while keeping the quiet air handler indoors. This design provides better efficiency and comfort compared to packaged units where all components are housed together. The SEER rating (Seasonal Energy Efficiency Ratio) measures how efficiently your system converts electricity into cooling, with federal law requiring new central AC units to have a minimum SEER of 13. Understanding the Seasonal Energy Efficiency Ratio is crucial for long-term energy savings.

Pre-Installation: Choosing the Perfect Location for Your Condenser
Getting the location right for your AC condenser unit installation is like finding the perfect spot for a backyard barbecue – it needs room to breathe, good drainage, and shouldn't annoy the neighbors! Your condenser's placement will make or break your system's performance for years to come.

Your condenser needs space to work properly. Think of it as a hardworking outdoor appliance that needs elbow room. The unit must have adequate airflow requirements with at least 10-12 inches of clearance on all sides for proper air intake and discharge. Don't forget about the top – maintain 18-24 inches from any overhead obstructions like eaves or overhangs.
For rooftop installation situations, we recommend a minimum of 5 feet of clearance from the unit's top to any obstruction. These recommended clearances aren't just suggestions – they're essential for efficient operation and give our technicians room to perform maintenance without doing acrobatics.
Ground surface preparation sets the foundation for your system's success. Your condenser absolutely must sit on a solid, level pad that won't shift or settle over time. While many folks think concrete is the only option, composite pads are often the smarter choice. These modern alternatives last as long as your AC unit, absorb vibrations better (hello, quieter operation!), and won't crack like concrete can in Arizona's temperature swings.
The pad should lift your unit at least 3 inches above ground level for proper drainage. Water pooling around your condenser is like leaving your car in a puddle – it's going to cause problems eventually.
When it comes to sun vs. shade impact, a little shade goes a long way. Your condenser works like a radiator in reverse, and just like your car runs cooler in the shade, your AC unit will too. However, be smart about proximity to vegetation. Avoid placing the unit directly under trees that drop leaves, sap, or debris onto the coils. Keep shrubs trimmed back to maintain those crucial clearances we mentioned earlier.
Noise reduction matters more than you might think. Modern units are quieter than their predecessors, but you still don't want the compressor humming outside your bedroom window at 2 AM. Consider your family's sleep patterns and outdoor living spaces when choosing the optimal placement.
Risks of improper placement are real and expensive. Poor airflow forces your system to work harder, leading to efficiency loss and higher energy bills. Worse yet, an overworked system experiences reduced lifespan and more frequent breakdowns. Nobody wants to replace a major appliance ahead of schedule because of a placement mistake that could have been avoided.
Getting the location right from the start saves you money, frustration, and ensures your new system keeps your Apache Junction home comfortable for decades to come.
The Professional AC Condenser Unit Installation Process: A Step-by-Step Breakdown
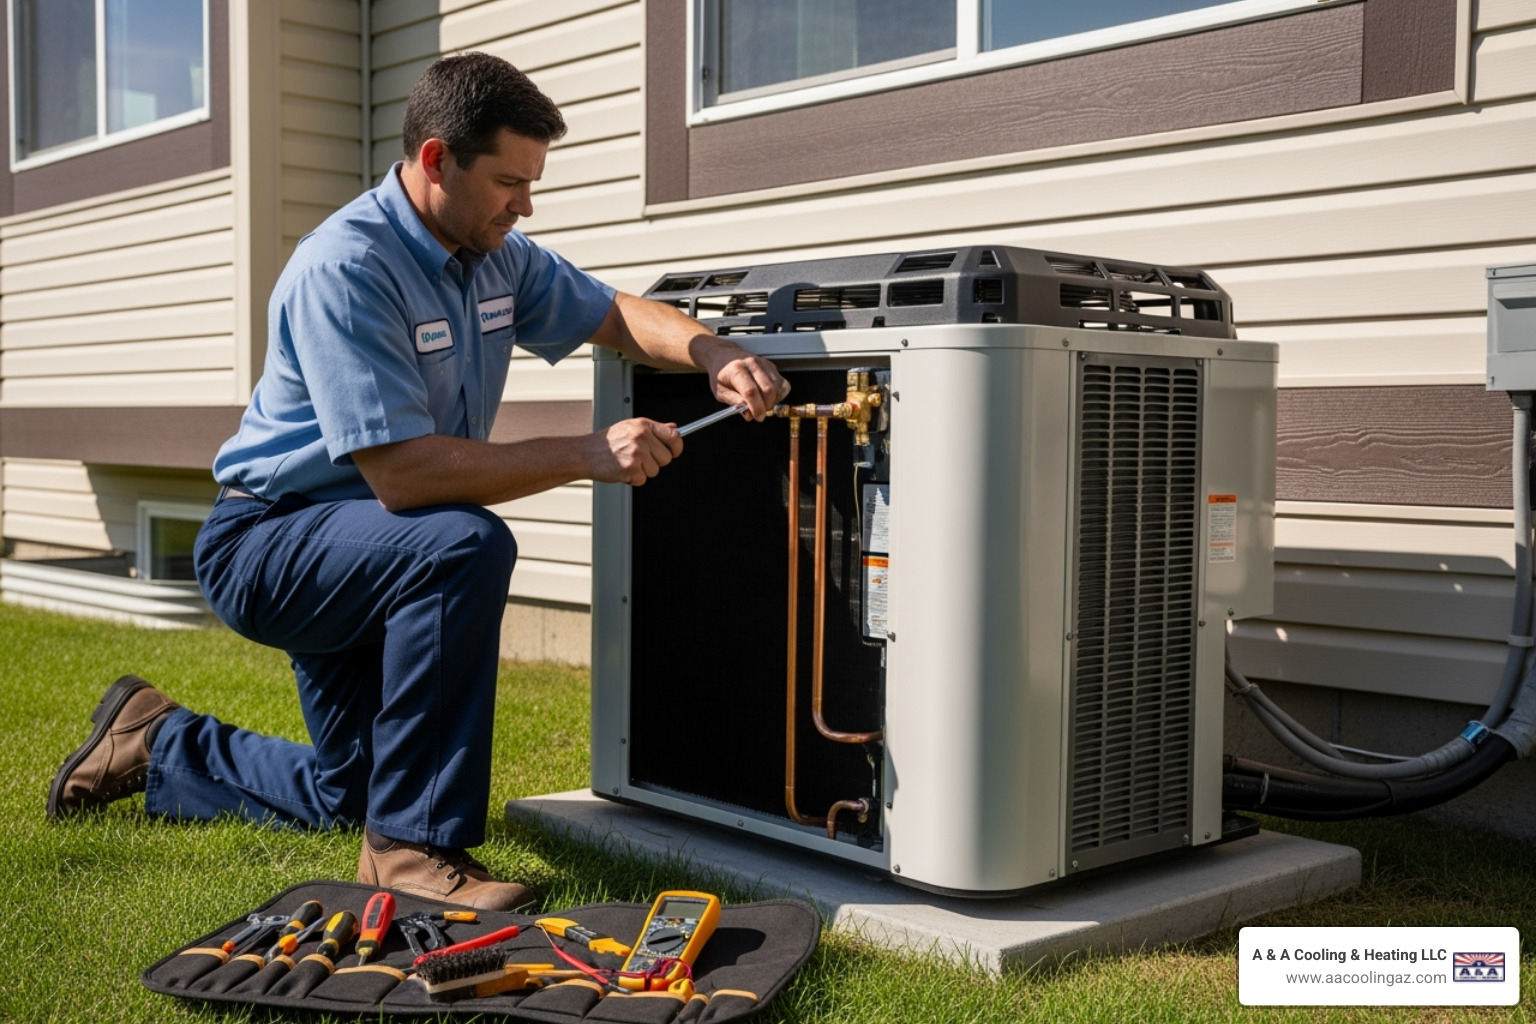
Let's be honest - AC condenser unit installation isn't exactly a weekend DIY project. Think of it like performing surgery on your home's cooling system. You wouldn't want an amateur handling something this complex, and neither should you when it comes to your AC system.
Professional installation by licensed technicians is absolutely essential for several reasons. First, handling refrigerants requires special certification and equipment. Second, electrical connections must meet strict safety codes. Third, proper sizing and installation directly impact your system's efficiency and lifespan. When you invest in a new AC system, professional installation protects that investment and ensures you get the comfort and energy savings you're paying for.

Safety First: Essential Precautions
Before our technicians even touch your AC system, safety protocols kick into high gear. Disconnecting power is always the first step - both to the indoor and outdoor units. Electricity and HVAC work don't mix well, and we take zero chances with electrical safety.
Our team comes equipped with proper Personal Protective Equipment (PPE) including safety glasses, heavy-duty gloves, and steel-toed boots. This isn't just company policy - it's common sense when working with high-pressure refrigerants and electrical systems.
Safe refrigerant recovery is both a legal requirement and an environmental responsibility. The EPA has strict EPA standards on refrigerant venting, and for good reason. Refrigerants can cause serious injuries like frostbite or blindness on contact. If they're accidentally burned, they create toxic gases that nobody wants to breathe.
Brazing safety requires special attention since we're working with torches hot enough to melt copper. We use heat shields to protect surrounding components and always maintain electrical hazard awareness throughout the entire process. Every connection must meet National Electrical Code standards - no shortcuts, no exceptions.
Site Preparation and Old Unit Removal
The actual installation begins with careful site preparation. If you're replacing an existing unit, we start by safely disconnecting all electrical and refrigerant connections. Your old refrigerant gets recovered using specialized equipment - never vented into the atmosphere where it could harm the environment.
Leveling the ground might not sound exciting, but it's crucial for your new unit's performance. An unlevel condenser can cause vibration issues, drainage problems, and even premature component failure. We take time to get this right.
Pad installation comes next, and we typically recommend composite pads over traditional concrete. These modern pads absorb vibrations better, resist cracking, and last as long as your AC unit itself. Once the removal of existing condenser and lines is complete, we have a clean slate for your new system.
Setting the New Unit and Connecting Lines
Placing the new condenser on its prepared pad is like setting the cornerstone of your cooling system. Modern units are often significantly larger than older models, so we double-check all clearances to ensure proper airflow.
Installing new refrigerant lines is where precision really matters. We strongly recommend replacing the old line set rather than reusing it. Here's why: different AC systems often use different compressor oils, and mixing them can damage your new equipment. Even if the oils are compatible, debris from your old system's failure could contaminate the new one.
Brazing connections with nitrogen purge is a critical step that separates professional installation from amateur work. While brazing, we continuously flow nitrogen through the lines. This prevents internal oxidation that could create harmful contaminants inside your refrigeration system.
Filter drier installation happens next - this component absorbs moisture and filters contaminants, protecting your system's internal components. Finally, insulating the suction line prevents condensation and energy loss over the entire exposed length.
Electrical Connections and System Charging for a new AC condenser unit installation
High and low-voltage wiring must comply with both national and local electrical codes. We connect the power supply lines and the control wiring that allows your thermostat to communicate with the system.
Disconnect box installation provides a safety shutoff within sight of the outdoor unit. We often recommend fused disconnect boxes because they offer overcurrent protection, safeguarding your investment from electrical surges that could damage expensive components.
Grounding the unit is essential for safety - this isn't optional or negotiable. Once all electrical connections are secure, we move to vacuuming the system. This involves pulling a deep vacuum to remove all air, moisture, and non-condensable gases. We aim for 250 microns or less and hold that vacuum for at least 10 minutes to confirm the system is leak-free.
Charging with refrigerant happens only after achieving a perfect vacuum. We follow manufacturer specifications exactly, weighing in the precise amount and making adjustments for line set length. Verifying charge with superheat and subcooling ensures your system will operate at peak efficiency for years to come.
Commissioning and Final Checks for your AC condenser unit installation
The system startup procedure is like the moment of truth - when we bring your new cooling system to life. We follow manufacturer guidelines precisely, opening service valves and energizing the unit for the first time.
Testing thermostat communication ensures your indoor unit, outdoor unit, and thermostat are all talking to each other properly. Verifying airflow across both coils confirms everything is breathing correctly.
Checking for leaks involves using electronic leak detectors and soapy water at every connection point. Even tiny leaks can cause major problems down the road. Measuring operational performance includes checking pressures, temperatures, and electrical draws to ensure everything meets manufacturer specifications.
Our final inspection covers the entire installation from top to bottom. We make sure everything is neat, secure, and compliant with safety standards. Then we walk you through your new system's operation, explain basic maintenance, and answer any questions you might have. After all, you'll be living with this system for the next 15-20 years - you should know how it works.
Post-Installation: Maintenance and Troubleshooting
Your AC condenser unit installation is complete, but the journey to long-term comfort has just begun! Think of your new AC system like a car – it needs regular care to keep running smoothly and efficiently for years to come.

With proper routine maintenance, your central air conditioner will typically last about 15 years, and some systems can even reach 20 years. The secret? Staying on top of a few simple but crucial tasks that keep your system breathing easy.
Cleaning your condenser coils is one of the most important things you can do. Your outdoor unit is like a magnet for dirt, leaves, grass clippings, and all sorts of debris that Arizona's desert environment can throw at it. When these materials build up on the coils, they create a barrier that restricts airflow and forces your system to work much harder than it should.
We recommend giving your condenser coils a gentle rinse with your garden hose every few months, especially before the cooling season kicks into high gear. Just remember to turn off the power first! You don't need high pressure – a gentle spray from the inside out will help remove the accumulated grime without damaging the delicate fins.
Changing your air filters is equally critical, yet it's something many homeowners forget about. A dirty filter is like trying to breathe through a pillow – it restricts airflow and makes your entire system strain to do its job. Most filters need changing every one to three months, depending on how much you use your system and whether you have pets or family members with allergies.
Your AC system will usually tell you when something's not quite right, and learning to recognize these signs of malfunction can save you from bigger headaches down the road. Unusual noises are often the first red flag – grinding sounds might indicate compressor trouble, while hissing could mean refrigerant leaks, and banging or buzzing often points to fan motor issues or loose components.
Poor cooling performance is another telltale sign that shouldn't be ignored. If your home isn't reaching the temperature you've set, or if the system runs constantly without ever seeming satisfied, you might be dealing with low refrigerant, clogged coils, or a failing compressor. In Arizona's intense heat, these issues can quickly escalate from minor inconveniences to major comfort problems.
Keep an eye out for leaks or moisture around your outdoor unit. While a little condensation is normal, puddles or excessive ice buildup on the coils often indicate refrigerant leaks or drainage issues that need professional attention.
When faced with repairs, the age-old question arises: repair or replace? The answer depends on several factors, including your system's lifespan and the frequency of problems. If your unit is over 10 years old and seems to need repairs more often than it used to, replacement might make more sense in the long run. Newer systems are significantly more efficient, which means lower energy bills that can help offset the investment over time.
However, if you're dealing with a minor issue on a relatively new system, a repair is usually the smart choice. The key is working with experienced professionals who can give you honest advice about what makes the most sense for your specific situation.
At A & A Cooling & Heating LLC, we've been helping Apache Junction families make these decisions since 1976. We understand that your comfort is important, and we're here to help you get the most out of your AC condenser unit installation for years to come.
Frequently Asked Questions about AC Condenser Installation
Can I reuse my old refrigerant lines for a new installation?
We get this question a lot, and while it might seem like a smart way to save time during your AC condenser unit installation, we always recommend against reusing old refrigerant lines. Think of it like trying to use old plumbing for a brand-new kitchen - it's just asking for trouble down the road.
The biggest issue is that newer AC systems often use completely different types of refrigerant oil than older units. When these oils mix, they can seriously damage your shiny new compressor - and that's an expensive repair you definitely want to avoid. Old lines are also like hidden time bombs, potentially harboring moisture, debris, or contaminants from your previous system's failure.
Here's the thing: installing a fresh, clean line set isn't just about avoiding problems. It's about protecting your investment and keeping your manufacturer's warranty intact. Most manufacturers require new line sets for warranty coverage, so cutting corners here could leave you holding the bag if something goes wrong. Trust us, starting fresh with new lines is always worth it for the peace of mind alone.
How long does a new AC condenser unit typically last?
A properly installed AC condenser unit should keep you cool for about 15-20 years with good care. That's a pretty solid lifespan for such a hardworking piece of equipment, especially when you consider how much abuse these units take sitting outside year-round.
Now, living here in Apache Junction means your AC works overtime during those scorching summer months. Our desert climate can be tough on equipment, but that doesn't mean your unit is doomed to an early retirement. The key is treating it right from day one.
Quality installation makes all the difference. A unit that's properly sized, correctly charged with refrigerant, and installed by experienced technicians will always outlast one where shortcuts were taken. Regular maintenance is your best friend too - annual tune-ups, keeping those coils clean, and changing filters religiously can help your system reach that 20-year mark or even beyond.
At A & A Cooling & Heating LLC, we've been helping Apache Junction families since 1976, and we've seen how proper installation and maintenance can extend equipment life well beyond expectations.
Do I need a permit to install a new AC condenser?
Yes, you'll almost certainly need a permit for your AC condenser unit installation, but don't worry - you won't have to steer that paperwork maze yourself. Permit requirements vary from city to city, but most municipalities require permits for any significant HVAC work, especially when electrical connections are involved.
The permit process exists for good reasons. It ensures your installation meets local building codes and safety standards, which protects both you and your neighbors. Think of it as quality assurance from your local government - they want to make sure everything is done safely and correctly.
Here's the good news: when you work with a reputable professional contractor like A & A Cooling & Heating LLC, we handle all the permitting for you. We know exactly what permits are needed, how to file the paperwork, and how to schedule the required inspections. It's all part of our service, so you can focus on staying cool while we handle the bureaucracy.
This approach ensures your installation passes all inspections and meets every code requirement. Plus, having proper permits and inspections on record can be valuable if you ever sell your home - it shows potential buyers that the work was done professionally and legally.
Conclusion: Ensuring Long-Term Comfort and Efficiency
Getting your AC condenser unit installation right the first time isn't just about having cool air when you need it – it's about creating a foundation for years of reliable comfort and energy savings. Think of it as an investment that pays dividends every single day, especially during those scorching Arizona summers when your AC becomes your best friend.
Proper installation truly makes all the difference. When your condenser unit is placed in the optimal location with adequate clearances, sits on a solid pad, and has all its connections done by skilled professionals, it can operate at peak efficiency for its entire lifespan. This means lower energy bills, fewer unexpected breakdowns, and that wonderful peace of mind knowing your system won't leave you sweating when temperatures soar.
The technical aspects we've covered – from refrigerant handling and electrical connections to system commissioning – might seem overwhelming, but that's exactly why professional installation matters so much. Licensed technicians have the training, tools, and experience to handle these complex procedures safely and correctly. They ensure your system meets all local codes, operates efficiently, and maintains its warranty protection.
Regular maintenance after installation keeps your investment performing at its best. Simple steps like changing filters and keeping the outdoor unit clean can significantly extend your system's life and maintain its efficiency. A well-maintained AC condenser unit typically lasts 15-20 years – that's a lot of comfortable summers ahead.
At A & A Cooling & Heating LLC, we've been helping Apache Junction families stay comfortable since 1976. Our experienced team understands the unique challenges of Arizona's climate and knows exactly what it takes to install and maintain AC systems that perform reliably year after year. We're not just installing equipment – we're ensuring your long-term comfort and satisfaction.
Ready to experience the difference that professional AC condenser unit installation can make? Schedule your professional AC installation today and let our expert technicians handle every detail. Your future self will thank you when you're staying cool and comfortable while enjoying lower energy bills and reliable performance for years to come.
Recent Posts

Customer Reviews

A & A is professional, fast, and honest. They have a hometown work ethic and take care of you almost like family! Dave is a great tech and I would recommend him to anyone. We had our AC go out and they came out and stayed past 7 pm to keep us cool on a day when temps were going to reach 105! THANK YOU!
Richard Champ

Excellent service, they are very dependable and upfront about the work. I would highly recommend this company for any heating or cooling issues. Being a snowbird it’s often scary finding reliable services, this is one company you can count on.
Kathy S

A & A is professional, fast, and honest. They have a hometown work ethic and take care of you almost like family! Dave is a great tech and I would recommend him to anyone. We had our AC go out and they came out and stayed past 7 pm to keep us cool on a day when temps were going to reach 105! THANK YOU!
Jamie S


Blogs
Stay updated with our latest blog posts.